Zendesk-Guide
Zendesk Guide:
-
Request access from IT – Admin Access is assigned to a Supervisor while the representatives will only have access to the home page and views
-
Cloud-based, can be accessed anywhere using a specific TLC Marketing Zendesk Link
-
Emails / Voicemails should be responded to right away or up to 3 business days
-
Calls are active for 30 seconds and if no one responds, customer will either leave a Voicemail or drop the call completely
-
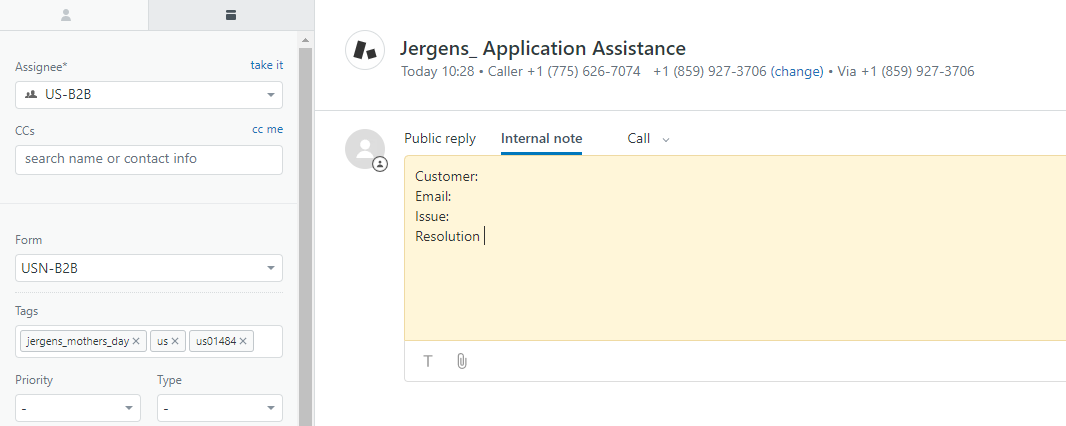
Internal Notes are for calls or any notes that should not be shown to the Customers. Use the below template when updating calls:
- Subject:
- Customer:
- Email:
- Issue:
- Resolution:
-
Public Replies are for emails and email responses
-
Update Call Subjects accordingly for easier reporting
-
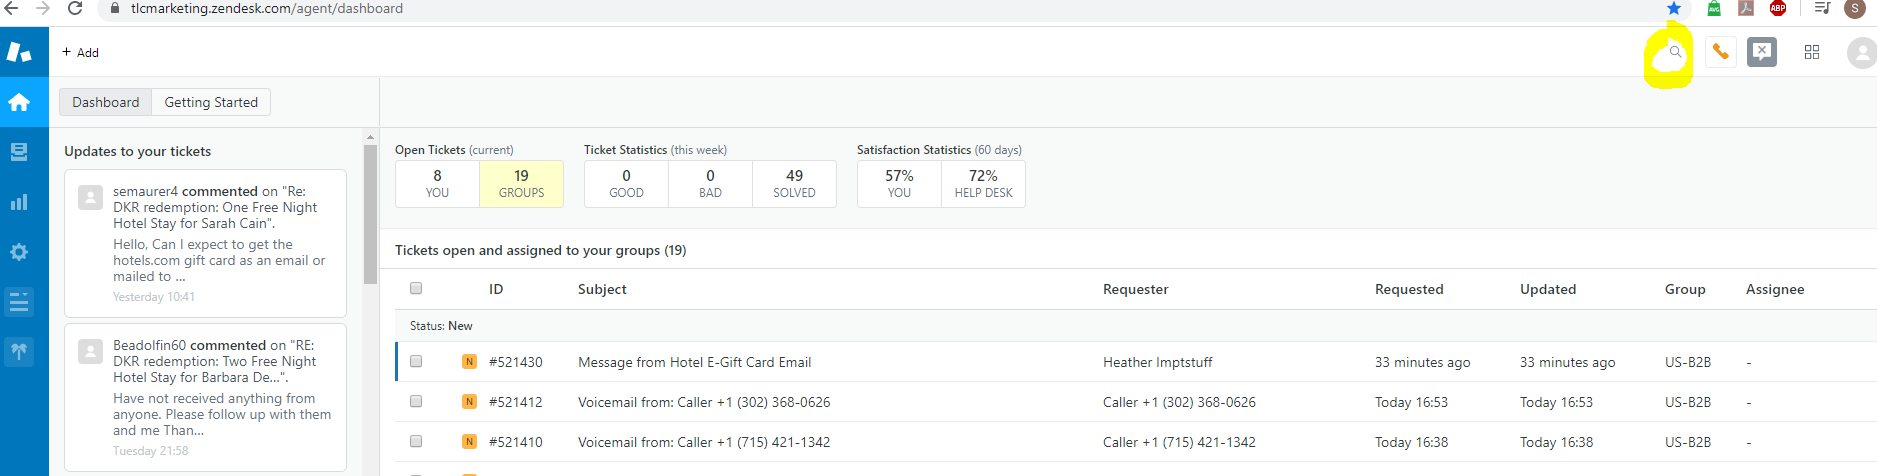
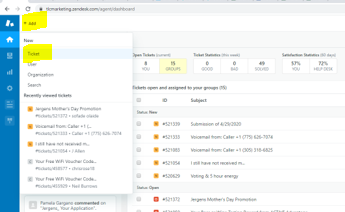
Utilize the search button to look up Zendesk Tickets, previous Customer Calls or Emails – use customer’s Name, Email Address or any key word that would’ve been used to update the ticket
-
Create Macros for recurring call or email trends. Make it a practice to plug in Qualified Email copies per active campaign as Macros as customers are most likely to request for the qualified emails to be resent
-
To create Macros, see screenshot below
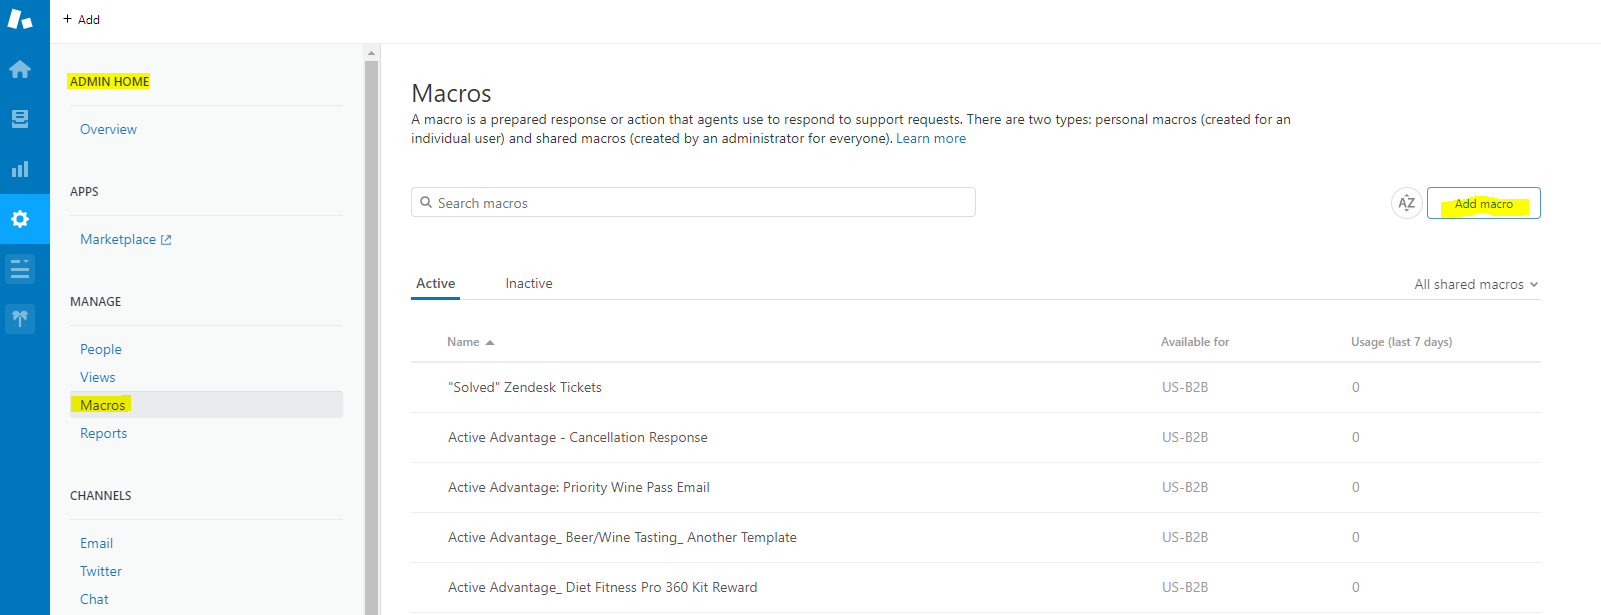
-
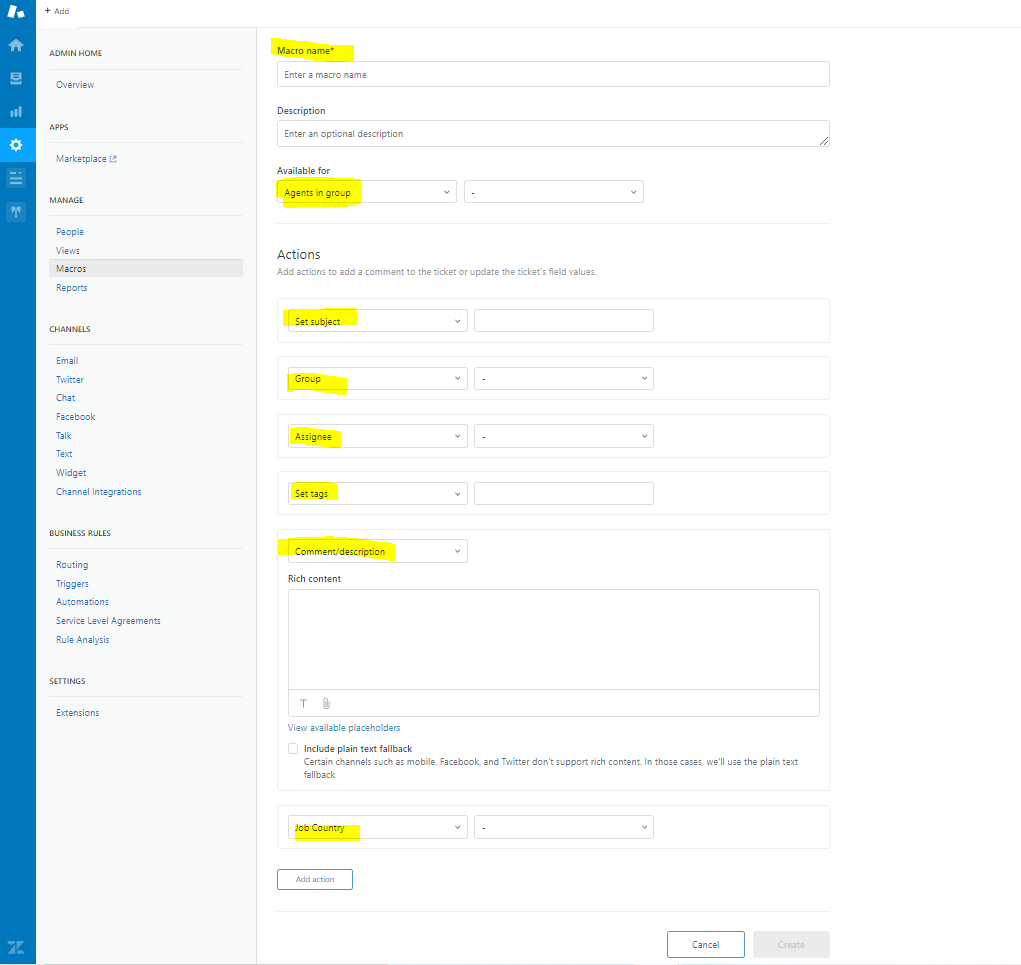
Click on “Add Macro” and click on Add Action to get to the fields shown in the screenshot. Required Fields are:
- Macro Name
- Agents in Group
- Actions:
- Set Subject
- Group
- Assignee
- Set Tags
- Comment/ Description
- Job Country
- Job Description
-
Then, click “Create Macro” to save.
-
-
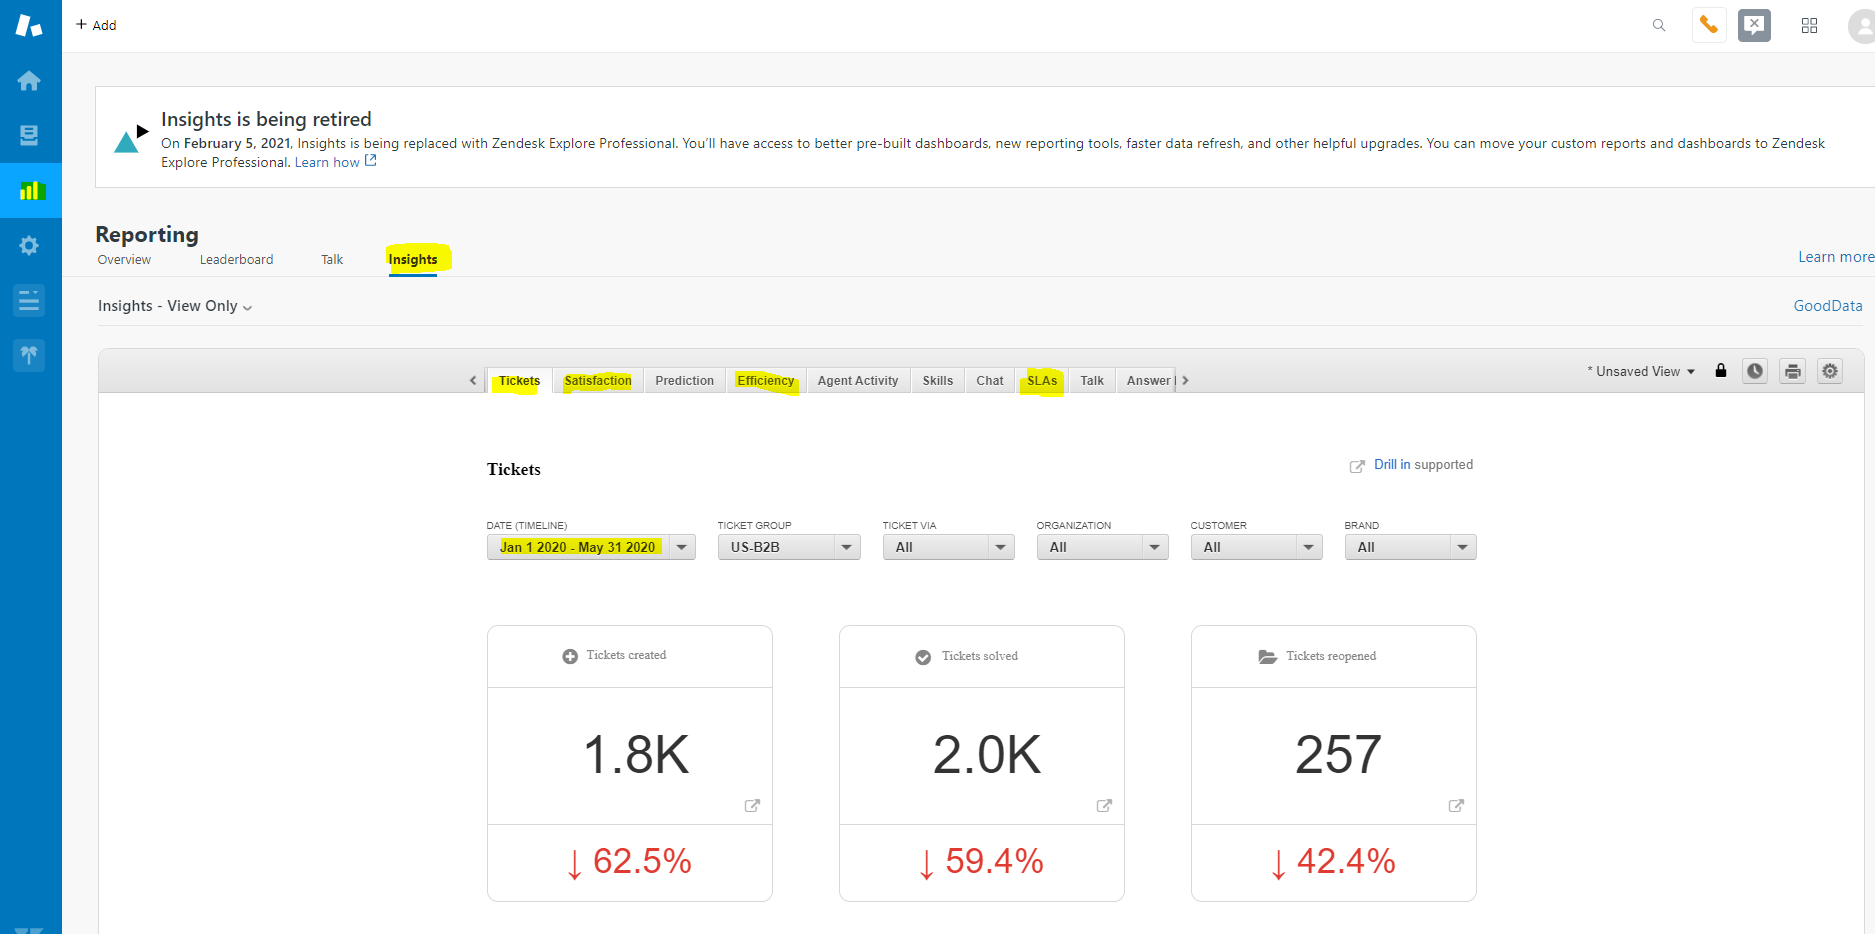
To review Zendesk Results, go to Reporting then, Insights
-
Under Tickets, update the Dates that you want to see in the report. From here you will see the total tickets received by the team, the Solved tickets and the Re-Opened Tickets
-
Satisfaction is the Satisfaction Score from the automated CS Survey generated when an email ticket is Solved . This includes the Response Rate and % Surveyed
-
SLAs will show the achieved SLA %, average fulfillment time for the Zendesk Tickets , etc
-
To export all Zendesk Tickets, go to Admin , Manage then, Reports
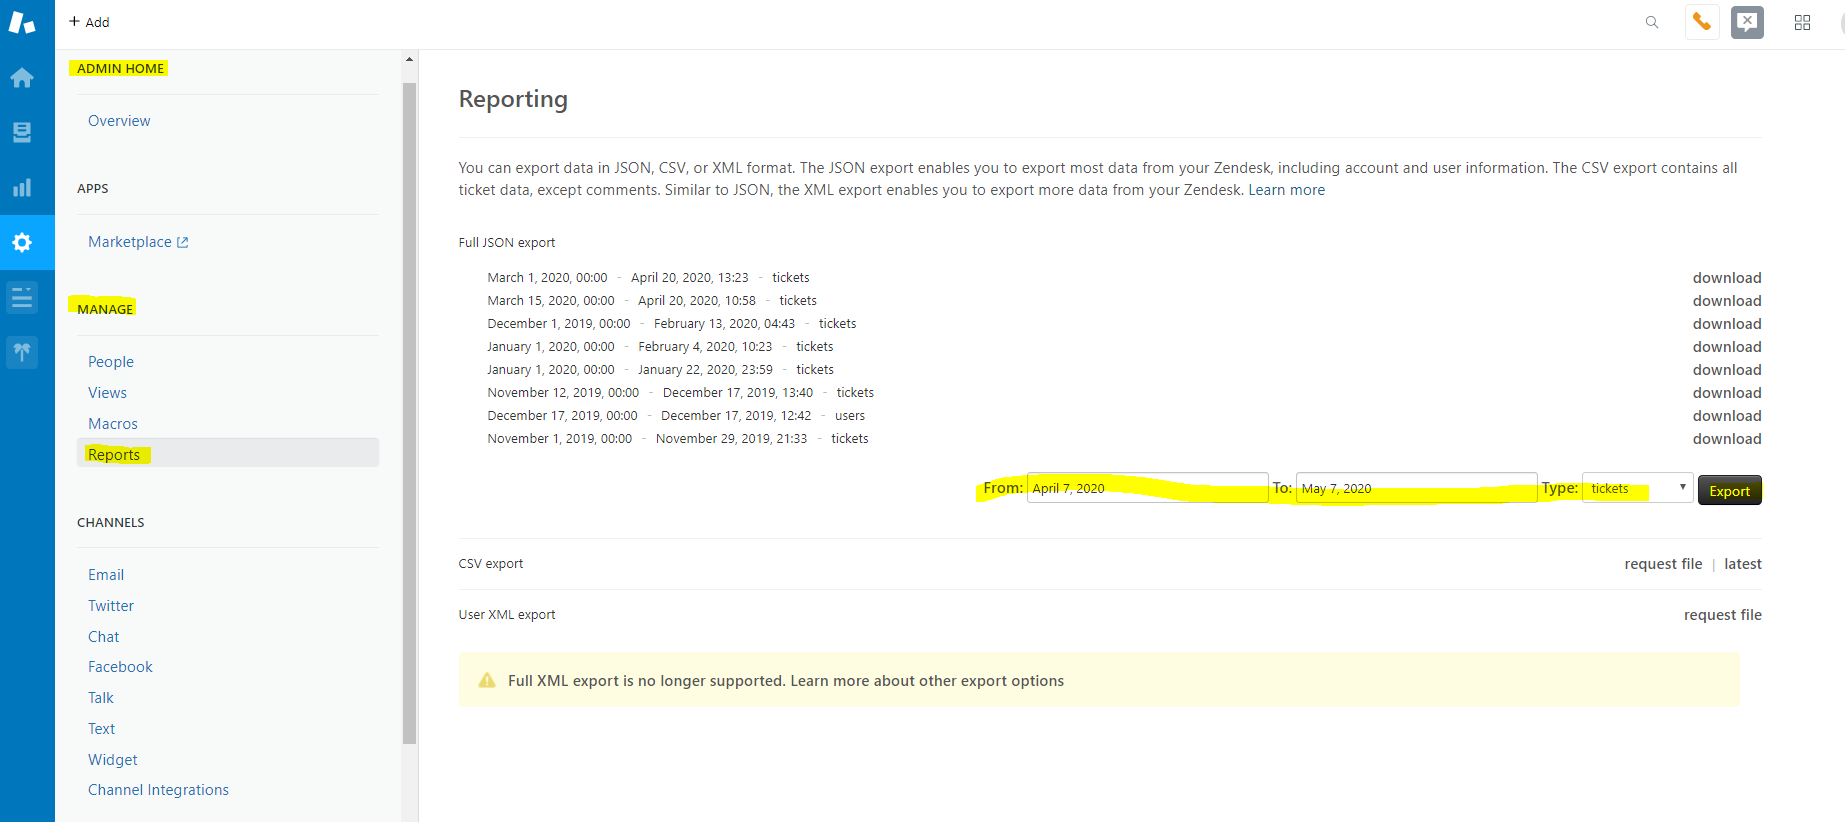
-
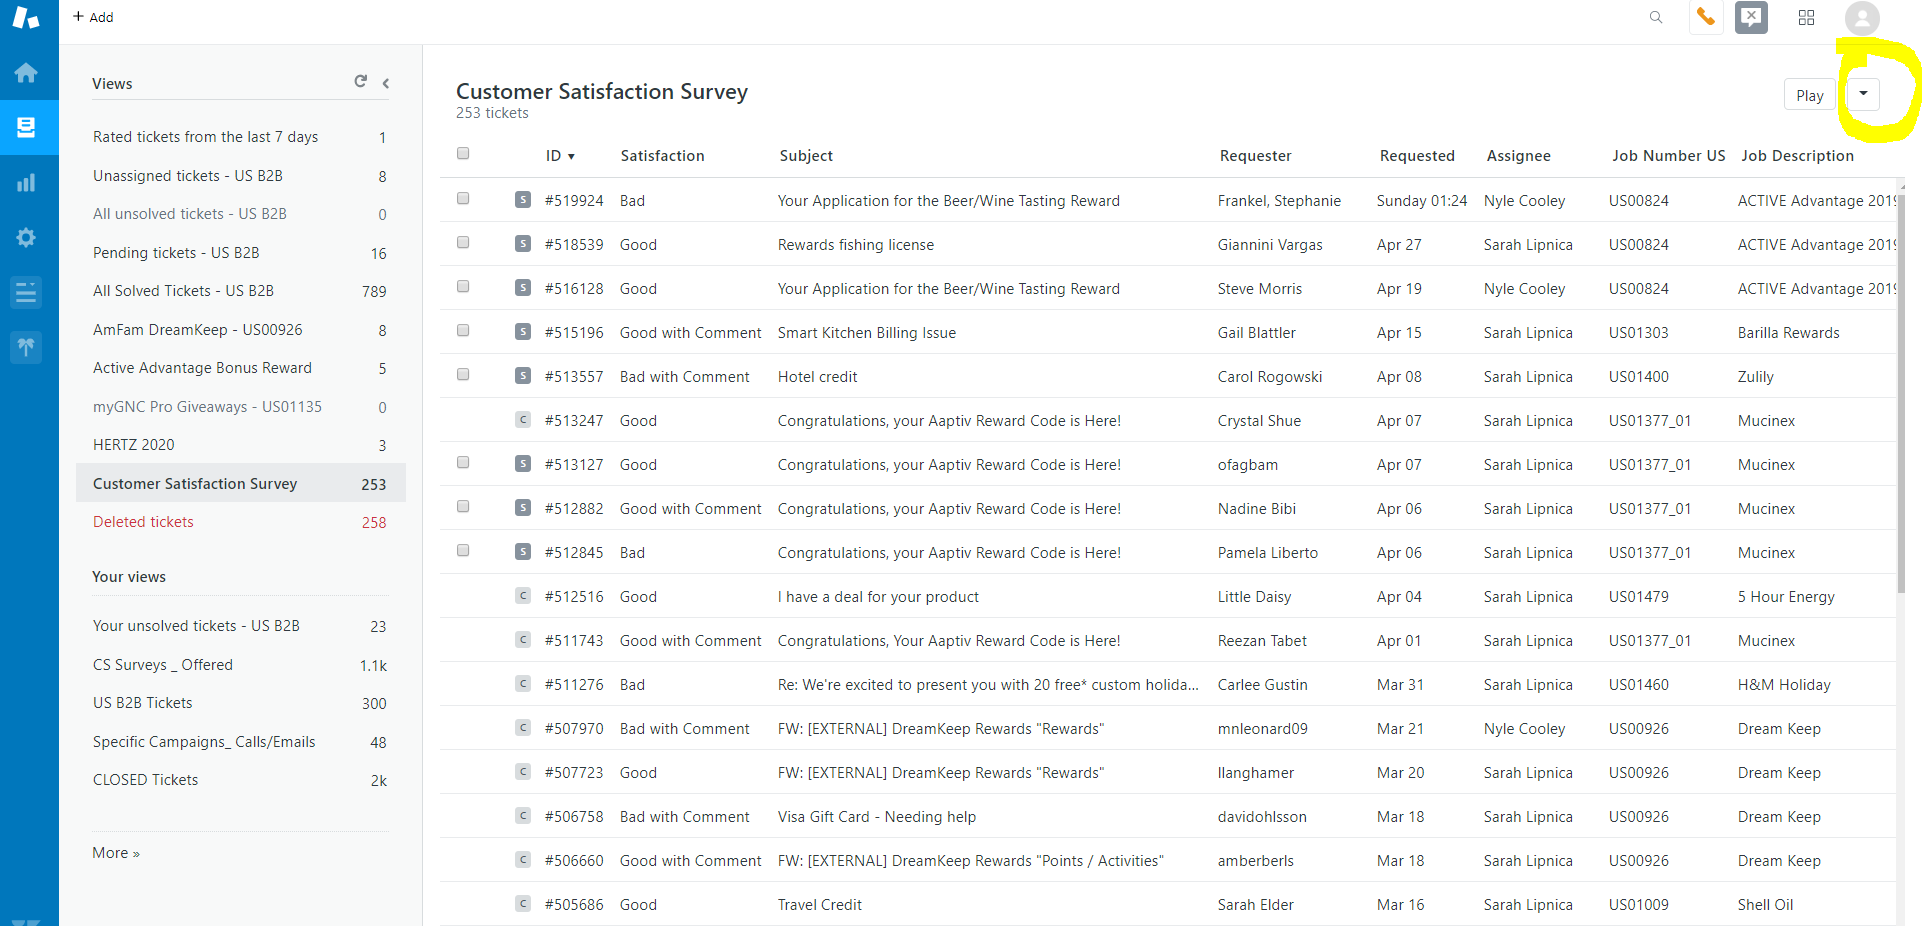
To view Customer Satisfaction Survey results, go to Views, then, Customer Satisfaction Survey, in the right hand side, click on the drop down to Export the report
-
Zendesk Interface:
-
To access the tickets, simply hover your mouse to the ticket number or subject and left click in your mouse to Open
-
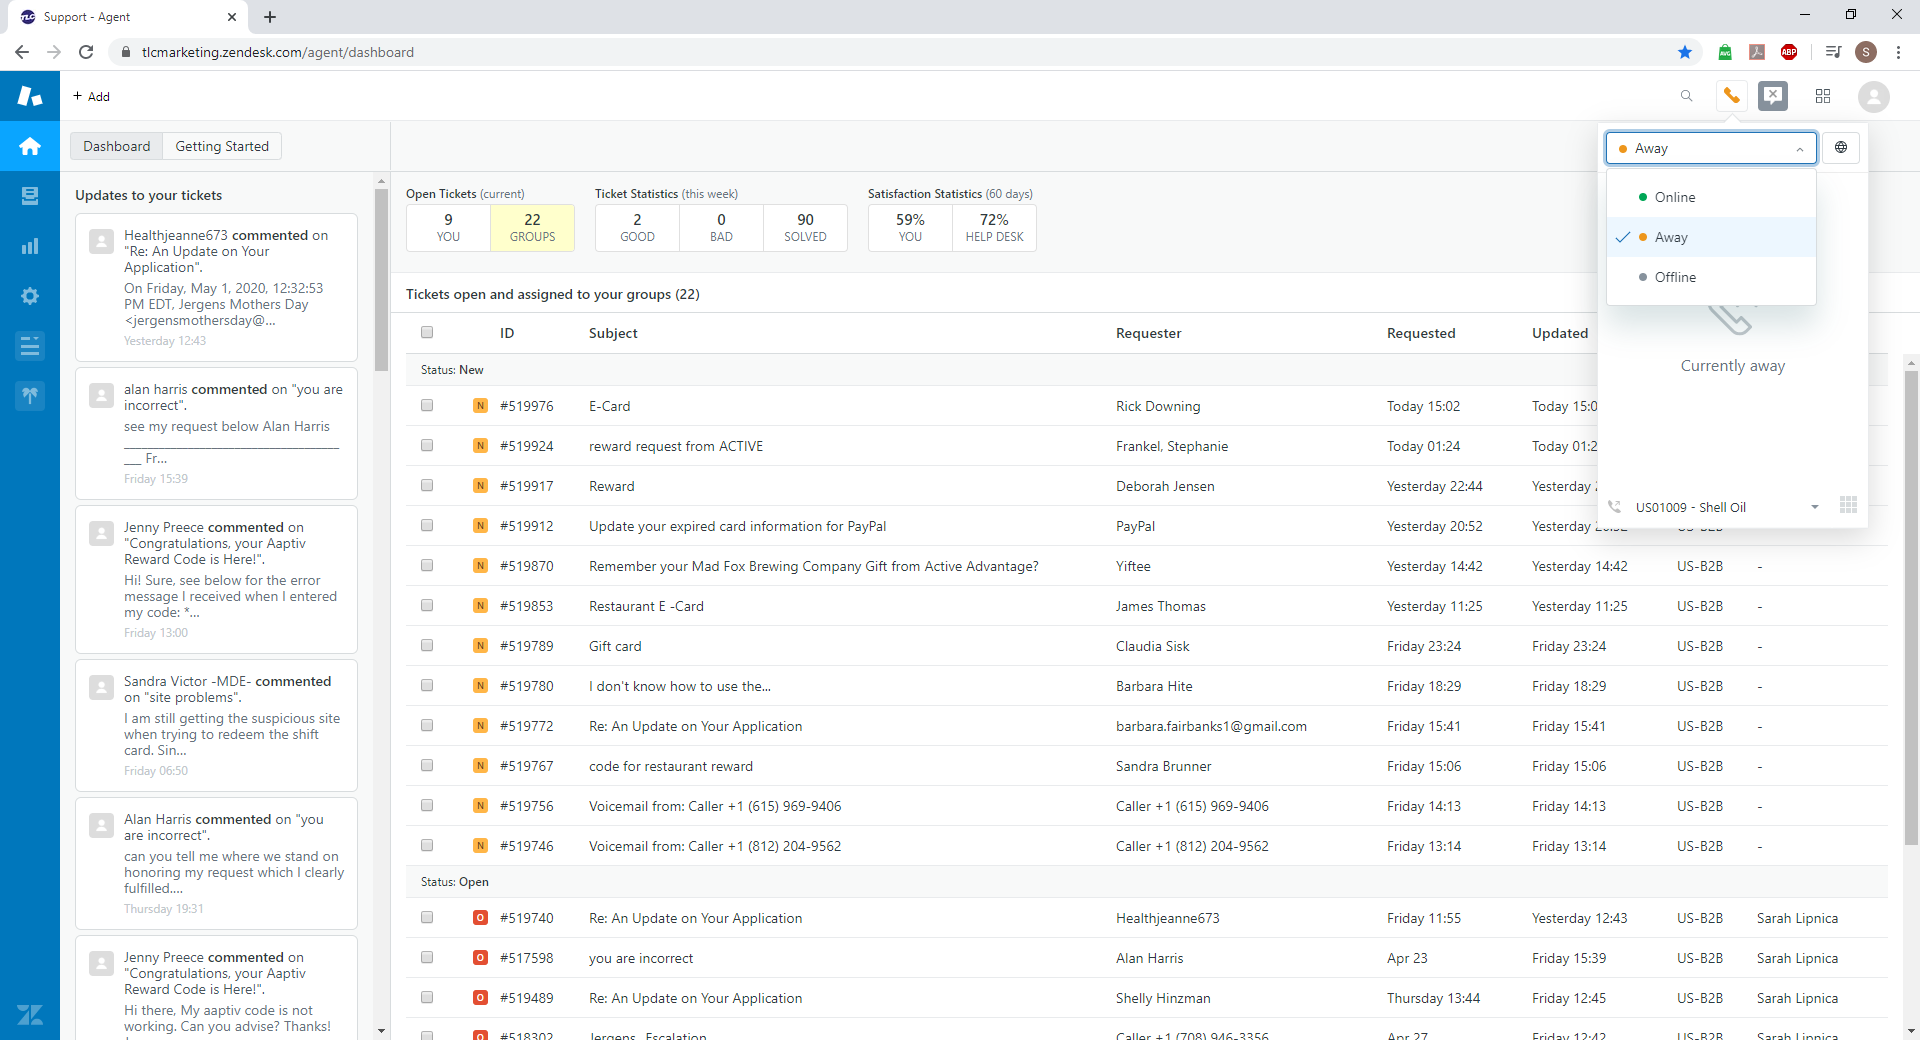
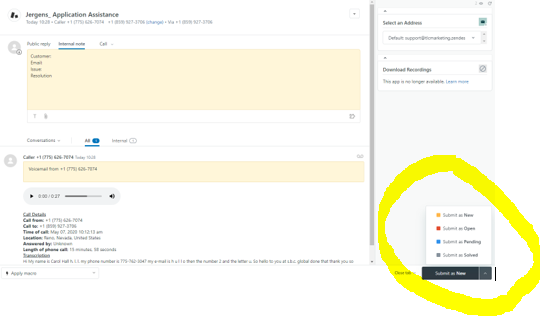
To change your Status, click on the handset sign (
 ) , click the drop down to either of the following status:
- Green – Online – you will receive Calls which should be answered within 30 seconds before the customer gets routed to Voicemail or another agent on queue
-
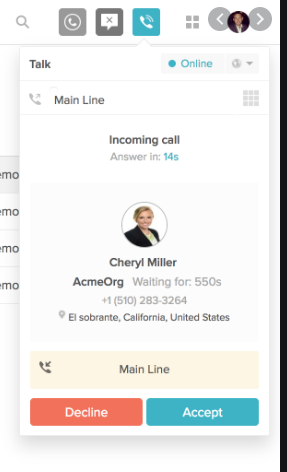
When a call comes in, a call console ( see image below) will appear in the screen showing the Campaign Name ( under Main Line) and the Customer’s Phone # . Click “Accept” to answer. We normally don’t use “Decline” as it set a very bad experience to the customers.
-
To handle the call, refer to the script indicated in the CS Brief to ensure correct branding. Example: Thank you for call TLC Marketing regarding Jergens Skincare Rewards, this is Sarah. How can I help you?
-
Ensure that every call is Documented in Internal Notes and Subject is Updated
( see sample below)
-
When you’re done updating the call, click “Solved” to close the ticket ; “Pending” or “Open” if the issue is unresolved
-
To answer a Customer Email, simply hover your mouse to the ticket number or subject and left click in your mouse to Open
-
Plug your response in the Public Reply Field, observe professional yet friendly email etiquette
-
Leave the subject as it is
-
To send, click on the bottom , right hand side of the screen and select “Open”. You will now be automatically directed to the home page
-
-
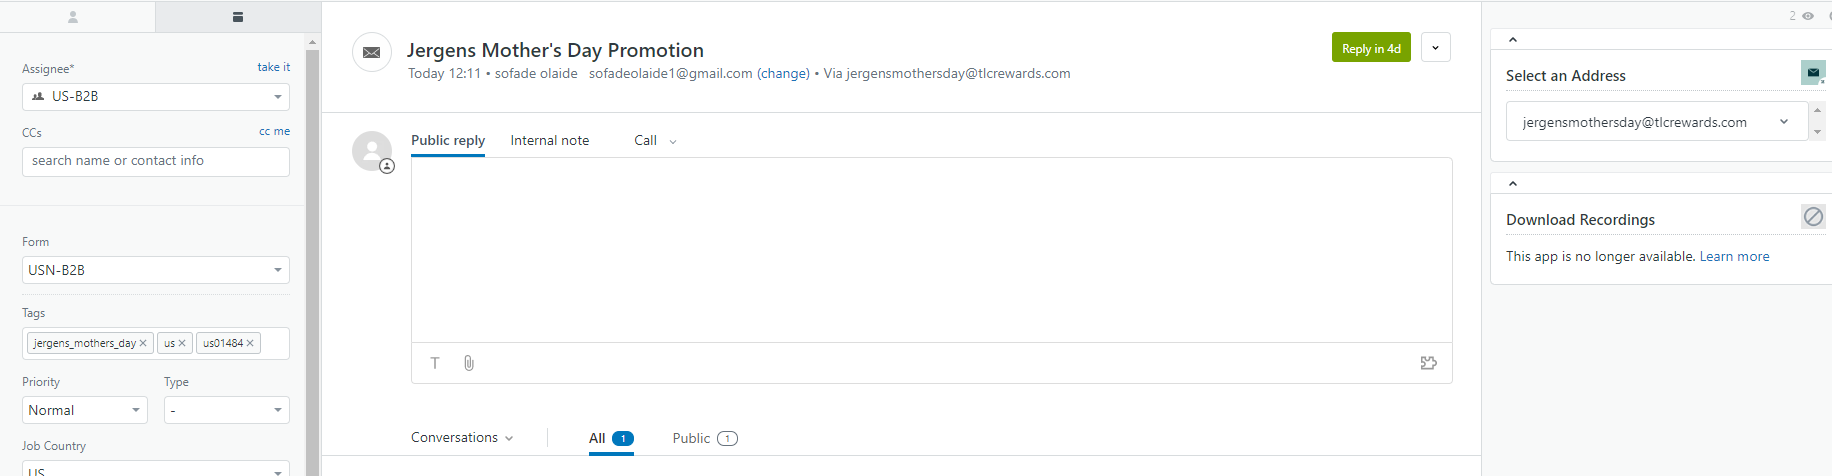
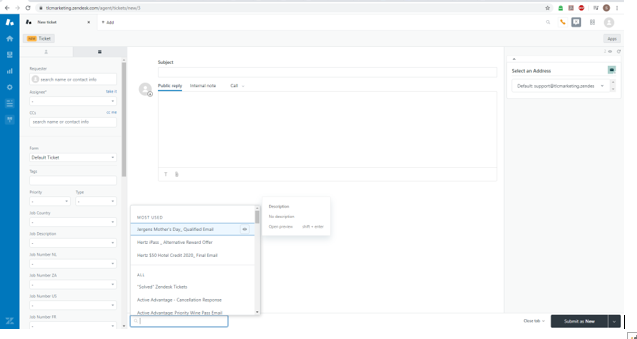
To write an email, in the upper left hand corner of the screen, click on the “+” sign to create a new ticket
Then, you will see the screen below, fill out the necessary fields:
-
- Green – Online – you will receive Calls which should be answered within 30 seconds before the customer gets routed to Voicemail or another agent on queue
-
Requester is the Customer’s Email Address
-
Click on the drop-down box under Assignee and choose yourself
-
CCs could be another customer (we don’t use this at all)
-
Tags will be the campaign name (just type it in)
-
Priority is Normal
-
Job Country is US
-
Job Description is the Campaign Name
-
Type in the Subject of the Email
-
Type in the Body of the Email under “Public Reply”
-
At the bottom part of the Public Reply, you can see “Apply Macros” – these are pre-filled responses that were created in the Admin, Macros side of Zendesk (only Supervisors have access). See Notes on how to Create Macros below
-
Under Select an Address, choose the campaign’s Email Address (ensure that this is done to avoid confusion on the customer side)
-
Then to send the email, choose “Open” (if you’re expecting a Reply) or “Solved” if the issue is resolved after that email
- Orange – Away – mostly used when you’re logged in but responding to emails or finishing your Call Notes
- Gray – Offline – used when you’re done with your shift or not working on emails or calls